Showing posts with label Rangers. Show all posts

Tuesday, 26 May 2020

Rangers of Shadow Deep - Mission 1, Scenario 1

Rangers of Shadow Deep - Mission 1, Scenario 1 - Deserted Village

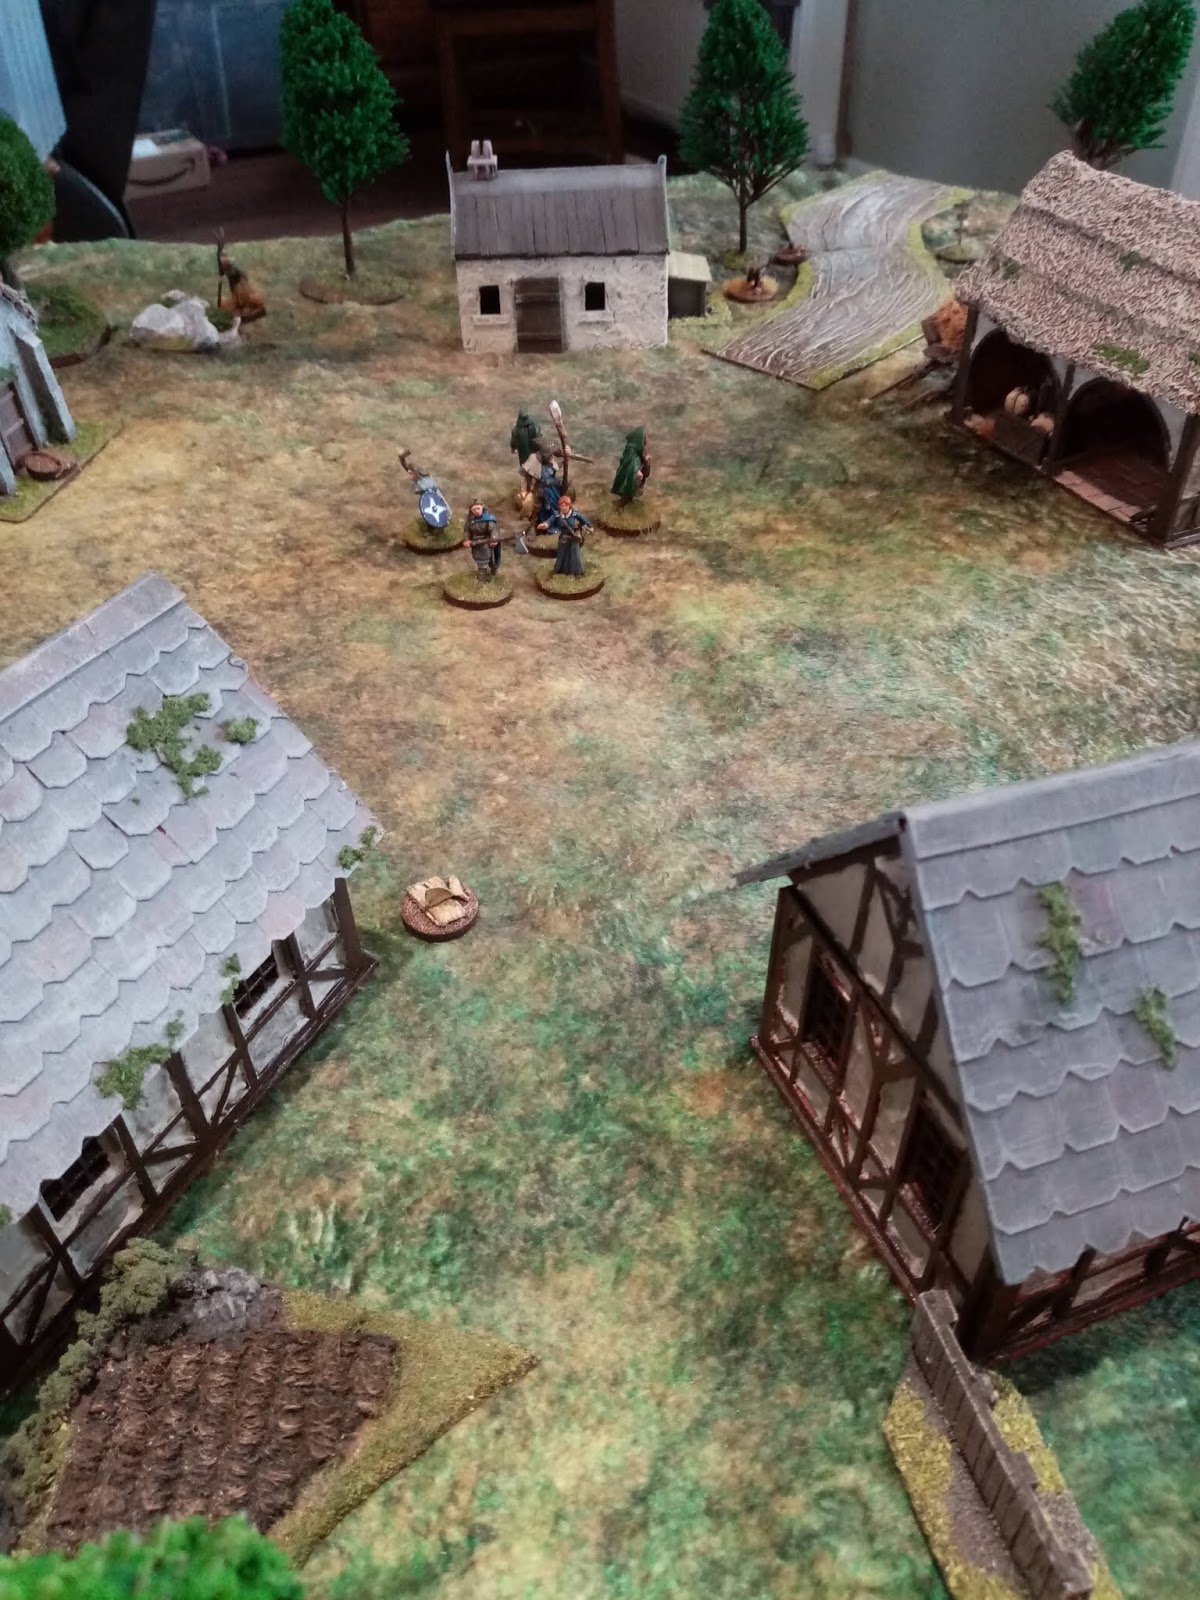
My first game of RoSD. The setup is on a 3x3ft area, the group starts in the centre of a deserted village with 5 abandoned buildings. There are 6 clue markers, 4 in line with each intermediate compass point (NE,SE,SW,NW) and about 14 inches away from the centre. The final two are in two random buildings.


The scenario starts with 2 Giant rats on the table and 2 zombies. As companions I selected the following: Templar, Rogue, Man-at-arms, Conjuror, Arcanist. I passed the task roll for perception and was able to move 1 clue marker closer to the group starting position.


In the first turn my Ranger attempted to shoot a rat. Missed. Arcanist, Rogue and conjuror moved north, the rogue towards a building with a clue. To note here I probably shouldn't have allowed myself to know which buildings had clues, it would be easy to simply roll once the door had been breached, it would have made the mission more complicated at least!


The Man-at-arms and Templar moved south to another clue marker in a building and closer to the southern zombie. I then moved the zombies and rats, which was wrong, they should have activated before the companions moved. No harm on this round and a good lesson to remember the proper sequence!


The Templar was getting good rolls and she twatted the zombie in one hit. The Arcanist was fortunate that the zombie closing in on her required both actions to move to get to her. The conjuror was well placed to send a bolt of magic into the zombie allowing the Arcanist to move away, in some panic! The Rogue set to work on picking the door lock and succeeded. However the clue marker inside resulted in a zombie being in the house and surprising her.


I got this bit wrong, I allowed the Rogue to move away which when having an enemy in base contact, I don't believe is allowed.


At turn end more zombies started deploying as a result of the event deck. The basic strategy involved utilising the Templar, Man-at-arms and Ranger to use their combat skills to kill off the enemies while the others tried to sweep up the clues. It largely worked. The ranger had to move north and support the squishy types at one point but withdrawing and consolidating towards the fighters allowed them to survive and continue uncovering the clues.


The conjuror even managed to pick up some treasure, which turned out to be an explosive flask. The zombies and rats came on thick and fast but the waves were defeated without too much hassle luckily although the Arcanist took a big hit but limped through on 2 hit points!


It was a fun game and moves quickly when you get a grip on the basics. There is a good amount of uncertainty so works as a solo game nicely. And as mentioned earlier I can ramp this up by "hiding" the clues in random buildings, or more accurately, rolling for them once the door has been opened.

All in all a great wee game, plays well and easily and not much of a burden in order to get on the table. 

Monday, 1 October 2018

29 Let's Go - US Supports part 2

I enjoy making terrain, probably because I don't need any particular finesse in order to produce something that looks half decent. Whereas the trouble I have with painting miniatures is that I'm just not very good. So do forgive these amateur daubings, it is really only myself and one other who usually see them.

Previous I wrote about making up some supports for the 29 Let's Go campaign I am undertaking with a friend. This is just to close the loop now they are painted.

They got primed with a cheap grey spray paint, during which I managed to break one of the chaps off his base, clearly hadn't done a good enough job on the gluing bit. Ho hum. Plastic mini superglued onto a metal coin, I may revise my method in future, or just pile on more glue. Probably the latter.

I follow the artizan designs paint guide, making do with close analogues if I don't have the exact paint. I read a fair few tips about how to do this stuff and the method that seems to work for me is painting from the inside out, ie skin first, then clothing out to webbing and equipment.

After the main colour I simply brush on some wash, then try highlight some of the larger areas or items. And that is it. Not pretty, not special but it works for me. I struggle to paint neatly let alone trying to wet blend and layer, so I'm shooting for an acceptable (to me) standard.

(as a side note I really need to improve the lighting, all the pictures seem to come out a lot darker than expected when I see them on the phone screen)

Anyway here are the unfortunate chaps, ready (or not) to face the Mighty Unterfeldwebel Otto Weinstein and his band of misfits.


Platoon Commander, Platoon Sergeant and the three squad leaders. (just a re-basing onto hexes here)

Wire team

Demo team


Mine clearance team


Flamethrower team

Extras. Brens, Rifleman, FOO, Ammo Carrier.
And that is the lot for this batch.

Wednesday, 12 September 2018

29 Let's Go - US Supports

Game one ended with a win to the Germans, and while I was able to cobble together the required numbers of figures for the game, the support options were lacking somewhat. Not one for original thought I "borrowed" the idea from Rich Clarke's own 29 Let's Go supports. I utilised my first paycheck from the new job on picking up a box of Warlord Games US Rangers from the ever wonderful, and very reasonable Caliver Books.

I don't have the same aversion that many online seem to have over plastics. They can be time consuming but I rather enjoy the construction bit. When I was a child I would occasionally get an Airfix or similar kit for a birthday or Christmas, like many others I'm sure, and I could never wait to put it all together. Sadly I was always too keen and ended up gluing bits on before they really should have been stuck on. Usually resulting in some surgery or just a bit of judicious force. Without the judicious bit.

Apologies I'm rambling again. Anyway, plastics I don't mind. I did however find that sticking bits of metal onto plastic is rather frustrating and involved the use of superglue which I am in no way neat and tidy with. The particular culprit was the flamethrower pack with arms attached. I could not get it to sit correctly. Ultimately I just forced it into place and declared myself satisfied.


In hindsight I should have cut the bit where the arm joins the pack and it would have freed up the movement a bit more I suspect. Anyway, it is done. The other two in the team are simple riflemen with goggles. Because in my mind you need goggles if you're in the Flame Team!

I attempted some "creativity" here by trying to make the other engineering options. The bangalores were as per Big Rich and his wire team. For the third chap I tried to make some wire cutters out of paperclip wire and some metal sprue. Looks dubious and more like blacksmith tongs than a wire cutter but this chap just picked up what he was told.


I believe it is John Bond from whom I stole the metal detector idea. Sorry "borrowed". All I can say is that man is talented and I, Sir, am not. Bodge complete and with a bit of paint and smoke he will do. He is joined by two more simple attempts (also borrowed ideas)

Rather than be sensible and have the wire team double as a demo team I decided to make them. A quick google showed explosives in two forms so I chopped up some sprue and thrust it into their grateful hands. I'm hoping some paint will transform the bundle of chopped up paperclip into something resembling a bundle of dynamite sticks. The blocks of explosive also got a crate to lie in for number three to kneel and fish them out of.

The radio screamed FOO to me so not one to burden myself with deep thought I ran with it.

And an additional crew member for the 30 cal.

Finally I re-based the SLs and JLs, onto hexagon MDF bases from Warbases. My Platoon commander is a bit of a bodge. I had a figure which I suspect was a para, standing in a strange pose, so I thought he would be rather identifiable.

I found the Rangers box contains a metal head with a captain or lieutenant helmet, can't quite make out if it is two bars or one. I may put this on him instead, it would look better I think. But then I have to contend with how to remove the head he has and painting up a new one and gluing it on. All new experiences for me, but probably worth the effort for the gleaming Captain bands on the new helmet!