Friday 28 September 2018

A very big house in the country - Building for 29 Let's Go

I had a quick look on google at the area in which the first game in the 29 Let's Go campaign is set, La Cambe. I wanted to get a better idea of the buildings in the area, not to make exact replicas but to guide some ideas so they suit it a little bit better!

This little project is looking at the building (house) in the north of the map, surrounded my sandy looking ground and some walls. (Not sure if I'm allowed to screenshot from the PDF so to remain on the good side of Too Fat Lardies the description will have to suffice!)

 I started with a small piece of hardboard, 10p from B&Q, my girlfriend asks for the price as they seem to give her much lower prices than they give me, this one was a very affordable 10p. I marked out a rough size and cut it up with a handsaw.


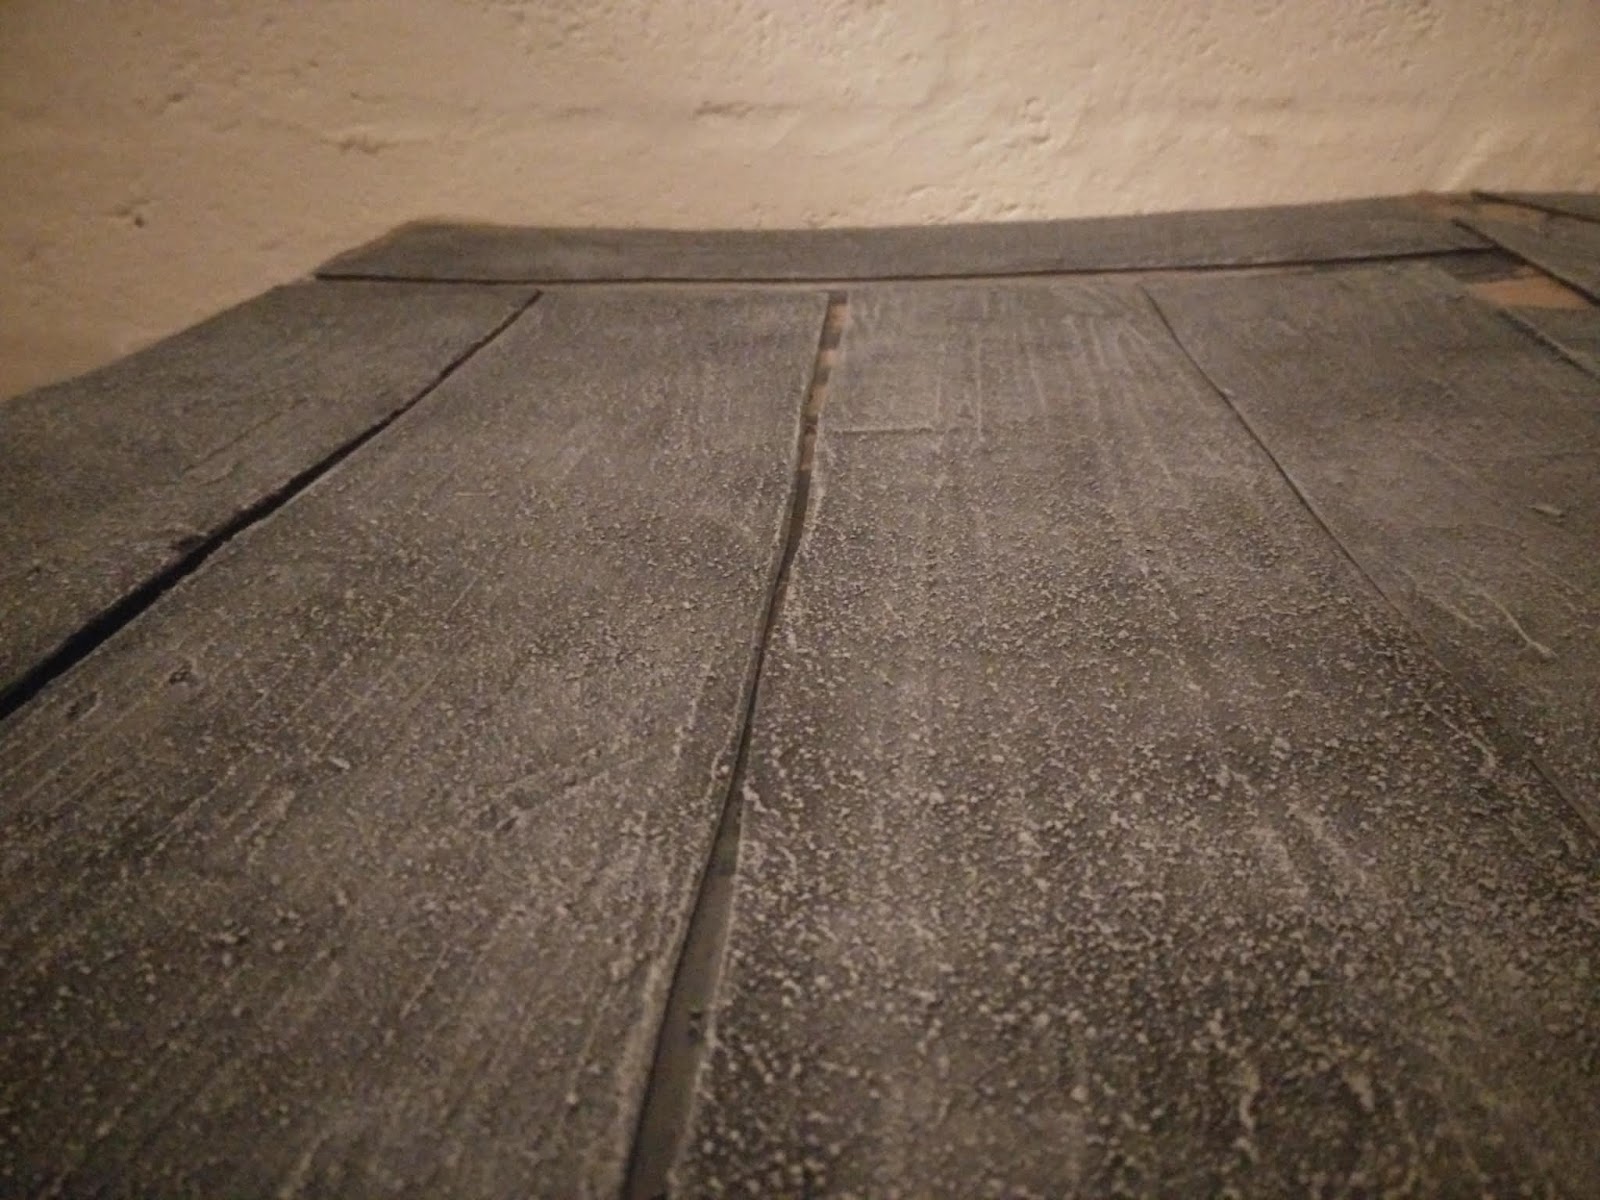
I cut the leftovers into two bits one of which act as an extension to the current piece, the second is the base to the house/building that will sit in the grounds. For areas that will be grassy I used acrylic caulk, for the rest I used PVA and fine sand. This will represent what I think is gravel or sandy coloured ground.

After some good hard thinking (Safety tip: I sat down so as not to injure myself) I decided the sand needs to run to the base edge so as to make it more flexible to future adaptations. So in subsequent pictures you will notice the change. Once the sand was dry I sprayed it with a PVA/water mix to get it properly sealed and set.

It is then coated in black emulsion for a base coat and once dry painted up according to the two varying shades. A sandy tone for the gravel area (I'm calling it gravel now); and standard brown dirt for the other bits.


Some flock and static grass is added to the non-gravel areas, and that is the base complete. On to the building.

I'm using foamboard or foamcore as I have it to hand. I've used the previously mentioned offcut of hardboard  as a base and rounded off the front. I've made the house about 8x5in as a rough estimate from the map (Probe at La Cambe). After sticking the walls on I realised I hadn't cut any windows in the front. Oops. Managed to do it when it dried easily enough.


I've added some card at the corners to hide the joins and perhaps give a slight impression of stone work, and added what will be flower beds out at the front. Then coated it all in a plaster and PVA mix. I bodged in some internal walls, partially as support but also to break up the wide open space inside.


The base and structure of the roof is made out of foamboard but with card as the large flat panels of the roof itself. On these are glued plaster castings from Linka roof tile moulds. Never done this before but I wanted to give it a trial to see what kind of finish I can get, and see how much extra weight the plaster adds. I only have one roof mould but I just kept casting in between working on other things and they slowly add up. It isn't as time consuming as I thought it would be, although I'm sure cardboard would have been a lot quicker.

The whole building is base coated in black emulsion, then painted up in light browns, greys, sandy tones and a highlight of what is termed "Fresh Barley". The shutters are painted in red. Don't know how historically accurate that is but I haven't painted any red shutters so that is enough of a reason for me! Both shutters and doors are made from foamboard, with the paper removed and scored to give it some woody texture.


The roof is painted in shades of grey, with some tiles picked out in blue, red or green to try and vary the final shade. I've also just noticed that the base board is warping slightly which you can see at the corner in the picture above. Very annoying, I'm sure with a bit of care I could have avoided that. I'll try bend it the other way and maybe coat the back in PVA or paint to try assist the process. I'll also add some greenery probably some tufts into the front flower beds to add some more colour to the build, but largely that is it, ready for Game 2!

Thursday 20 September 2018

Terrain Upgrades and Improvements - Farm Fields

More on the terrain preparation front for 29 Let's Go. This time I'm tackling some fields, specifically plowed or farm types.

The starting point are the mats you get for the car foot-well area. I used them pretty much straight from the packet for the first game but with a few cut up to provide the smaller shapes.


I don't think I need to do much to improve them, mainly a good base-coat and some dry-brushing of brown shades. As they are rather dark anyway I'll start with a burnt umber first layer.


While they were still wet I went over them in different areas with a second shade of brown (Forest brown, a cheap tester pot).


Once that had dried overnight I went over it with a mix of burnt umber and sandy beige to pick out some detail.


And I must say the pictures don't manage to show it at all. Needless to say they look a bit more varied than they appear!

I ended on a final highlight of "Fresh Barley" which just about shows up in the picture. If nothing else you have a fine series of photos of vaguely brown car mats. Well worth the effort of scrolling down this page!

I've been swithering back and forth about adding greenery to these. I came to the decision that I will leave them as is and make a few bits of scatter that can be placed in corners and on edges to represent those areas of the field the farmer can't get in to plow.

I cut up the MDF frame from some terrain sabot type bases, four sprues in total and gave me a good number of cornery type pieces to work with. I bevelled the edges with a stanley knife and sanded them down a little. I squeezed a dollop of caulk onto each base and them smeared it round, placed any rocks and bushes on the base then left it to dry.


Once dry it was a black base coat and brown for ground, grey for rocks. Followed by dry brushing and highlights.


Finally flock, I wanted to add some longer grass or shrubs for a more unkempt appearance but I don't have anything that suits, so I have ordered a box of tufts which will get added on at some point .

Wednesday 12 September 2018

29 Let's Go - US Supports

Game one ended with a win to the Germans, and while I was able to cobble together the required numbers of figures for the game, the support options were lacking somewhat. Not one for original thought I "borrowed" the idea from Rich Clarke's own 29 Let's Go supports. I utilised my first paycheck from the new job on picking up a box of Warlord Games US Rangers from the ever wonderful, and very reasonable Caliver Books.

I don't have the same aversion that many online seem to have over plastics. They can be time consuming but I rather enjoy the construction bit. When I was a child I would occasionally get an Airfix or similar kit for a birthday or Christmas, like many others I'm sure, and I could never wait to put it all together. Sadly I was always too keen and ended up gluing bits on before they really should have been stuck on. Usually resulting in some surgery or just a bit of judicious force. Without the judicious bit.

Apologies I'm rambling again. Anyway, plastics I don't mind. I did however find that sticking bits of metal onto plastic is rather frustrating and involved the use of superglue which I am in no way neat and tidy with. The particular culprit was the flamethrower pack with arms attached. I could not get it to sit correctly. Ultimately I just forced it into place and declared myself satisfied.


In hindsight I should have cut the bit where the arm joins the pack and it would have freed up the movement a bit more I suspect. Anyway, it is done. The other two in the team are simple riflemen with goggles. Because in my mind you need goggles if you're in the Flame Team!

I attempted some "creativity" here by trying to make the other engineering options. The bangalores were as per Big Rich and his wire team. For the third chap I tried to make some wire cutters out of paperclip wire and some metal sprue. Looks dubious and more like blacksmith tongs than a wire cutter but this chap just picked up what he was told.


I believe it is John Bond from whom I stole the metal detector idea. Sorry "borrowed". All I can say is that man is talented and I, Sir, am not. Bodge complete and with a bit of paint and smoke he will do. He is joined by two more simple attempts (also borrowed ideas)

Rather than be sensible and have the wire team double as a demo team I decided to make them. A quick google showed explosives in two forms so I chopped up some sprue and thrust it into their grateful hands. I'm hoping some paint will transform the bundle of chopped up paperclip into something resembling a bundle of dynamite sticks. The blocks of explosive also got a crate to lie in for number three to kneel and fish them out of.

The radio screamed FOO to me so not one to burden myself with deep thought I ran with it.

And an additional crew member for the 30 cal.

Finally I re-based the SLs and JLs, onto hexagon MDF bases from Warbases. My Platoon commander is a bit of a bodge. I had a figure which I suspect was a para, standing in a strange pose, so I thought he would be rather identifiable.

I found the Rangers box contains a metal head with a captain or lieutenant helmet, can't quite make out if it is two bars or one. I may put this on him instead, it would look better I think. But then I have to contend with how to remove the head he has and painting up a new one and gluing it on. All new experiences for me, but probably worth the effort for the gleaming Captain bands on the new helmet!

Sunday 9 September 2018

The long and winding roads

Dirt roads
Following an exchange over at the Too Fat Lardies Forum I decided it would be well worth the effort to try add some static grass to the patches on the dirt roads.

 I think the addition has really taken them up a notch. Very pleased with them now, the texture and height of the grass makes them come to life. So thank you very much Mr Hendrik from the forum!


To address one area of concern picked up, there has been some warping on some pieces, and majority has disappeared when bent in the opposite way, one piece has been a bit more tricky and required some more manipulation but is currently sitting flat. I think if it store it with the other roads on top it may help. So not entirely warp proof as a material but pretty forgiving, and certainly nothing I am going to worry about!

Metalled Roads
Yes more roads. Can't seem to make enough of them or rather I am just about making enough of them!

Alongside the dirt roads I've also been attempting some "hard top" style roads which are needed for the 29 Let's Go campaign. I only need about 6ft for the first game (we will be replaying the map as the Germans won) and about 8ft for the second scenario. So starting off with about 8-9ft will do for now. Incidentally I don't think we will get to play the next game until October now due to work and holiday (opponents) calendars. Disappointing but gives me more time to get the terrain sorted (and some supports painted up).

Similar to the dirt roads it is linoleum vinyl material for the base, cut into straights, a spread of caulk to cover and then fine sand poured over and lightly patted down, the excess then shaken off. This leaves a rather pleasant sandy stretch.

Once dried they all got the same treatment as the dirt roads. A good slopping of black emulsion. A rather thick coat as I found I had to load up the brush a lot to get a complete coverage of the surface. You can see some white edges peeping through below. These got dabbed up after the pieces had dried, and left for a bit more drying time.


Then some drybrushing, rather heavy handed, with a dark grey.


Followed by some lighter tones.


 I'm calling them done now. I won't be adding any green stuff as they may get used in towns where they wouldn't have grassy edges. I'm hoping that by themselves they will do the job.

Thursday 6 September 2018

Roads Part Deux

Spurred on by some lovely comments from the Too Fat Lardies Forum I've been sneaking some progress on the roads after work each day this week. Picking up where I left off with the roads base-coated in  cheap black emulsion. Next up was trying to get them looking like dirt tracks.

I started with an craft acrylic tube of paint, Burnt Umber, easily obtained from your local cheapo shop. The one thing I have taken to heart is that terrain need not be expensive to look decent. Leftovers and pound shops are the order of the day.

This left them looking rather darker than I had anticipated so I moved onto my next shade, a delightful Forest Brown from a tester pot. This brought the colour up to a lighter brown which was the effect I was striving for.


Then a blend of the remnants of the Burnt umber that was left in a wee pot, a good dollop of beige, the exact colour is obscured by paint now, and a few dabs of Forest Brown for good measure. This was dry brushed onto the roads to highlight the texture a bit more.


 It always amazes me what a little bit of contrast can do for the appearance of terrain. They are beginning to look quite serviceable. Some close ups to show that.


Those were taken whilst the last coat was still wet, so I will check back and see how it turns out. I may well add a further highlight of the pure beige colour just to finish them off.
As it turns out they had gone duller as I expected and so I ended up doing a pure beige highlight and then cracking on with some flock.


Cheap sawdust type, which I now feel is maybe not as grassy as I would like. I may try add some static grass (which I have never actually used) or some tufts to add a bit of different heights and textures. But for now I may well call them done, all that is left is a spray coating of PVA/water as I am told that really helps seal things on.


Monday 3 September 2018

Terrain Upgrades and Improvements - Roads

I bought a copy of the Chain of Command (CoC) rules a while back and got round to setting up the first game for myself and a friend, we both enjoyed it and he agreed to trying out a campaign. As I already have some painted US and German troops from an initial foray into wargaming, with Bolt Action, I selected the 29 Let’s Go Pint sized campaign and purchased it a wee while ago. Both of us are rather new to wargaming and this was the first campaign game we ever played.

As we played I felt that my table really needed help. So I’ve decided I’ll be using this campaign as a driver to create more and better terrain. The more part isn’t too difficult as I’ve only been in this hobby for coming up 3 years so anything I make will tick the more box. I also want to try and create terrain as beautiful as that seen on the numerous blogs around this here tinterwebs, that are literally too many to name. As I lack much in the way of originality I tend to copy what the clever creative types have already done. I’ll try remember to point out who influenced what as I make it. First up is roads.

Roads
I want flexible roads as I intend to make some hills in the future for some height variation and then any roads would need to be flexible, so worth the time and effort to do it now. Looking online there are a number of suppliers of flexible latex-type roads but I fancy trying to make them myself.

Numerous online sources seem to revolve around the use of acrylic caulk and a base fabric or material, while a number also advocate the use of vinyl tiles. I tried making some from vinyl tiles, I got a few packets for £1 each from the local pound-store, cut into a variety of shapes, a bit of plaster/filler, glue and sand. They were passable but I didn’t like the lack of flexibility.

Next I tried making a latex road. I used one of the vinyl tile roads as a form to cast from. I made a mould from plaster of paris and then poured latex into it and left to dry. The plaster seemed to hold a good amount of the fine details and this was successfully imparted to the latex. The issue I have is needing to create a plaster moulds for each different type of road, and the length of time it takes for the latex to set. I would also have to buy in a good amount of liquid latex. I may try tackle this in the future but for now a quicker method is in order.

So I ended up on a third method. From various other projects around the home I have quite a bit of what I call linoleum left over: a dappled grey and a light brown one. It may be called vinyl or rubber but in any case it is soft and pliable unlike the vinyl adhesive tiles. I actually used it as a quick and simple road for the first game of CoC. It cuts to size and shape easily and I just had a long continuous stretch, more for speed than appearance.
From this picture you can see the roads I used for our first game, simply “made” from cutting out some leftover linoleum.
I really don’t like the look of it as-is. The colour is too light and there is no feeling of depth to it. However the flexibility made me think, I could use this as the base of my roads and add some texturing to the surface to improve the appearance.


The linoleum cuts so easily that creating the variety of shapes is a doddle. You can mark the underside in pencil and cut it out with a craft knife (I use a Stanley knife).


I've cut out a variety of road-type shapes that I think will be useful, all about 4in wide, some 3in for narrow tracks.

After that it is a case of liberal application of caulk. I used brown stuff as I figured if it chips or breaks then it won’t shine through white. There is no skill or ability in this bit, I used a caulk gun to squeeze liberal amounts onto the pieces and then used an off cut of the linoleum to smear it over the piece.

This in itself gave it some good texture I think, but I also ran various bits of scrap plastic over it to add some impressions of traffic.

On a few I dolloped a load of caulk up the middle and tried to manipulate it into a hump. Varying degrees of success and I will see how they turn out. I should be able to add this to other pieces without too much trouble if it ends up looking good.


Full disclosure, I used the dregs of a tube of caulk on four test pieces first and let them dry before cracking open a new tube and smashing out the rest. I've base coated all these test pieces black, the rest will get the same treatment once they have dried. With a bit of space it doesn’t actually take long to do the messy smearing. I managed about 24 pieces, maybe 14ft of roads, in an less than an hour (although spread over 3hr period as I was distracted by various other things, more on those in future perhaps).


The test pieces had actually curled up once dry which concerned me a little but a judicious bending the other way soon sorted them out. The linoleum really is a wonderfully forgiving material. I hope it takes the sand, PVA and flock so easily as well. If it does I may well be tempted to try create some flexible fields out of the stuff.

Hopefully you can make out the process from the pictures, there isn’t great light in the space I am working in, but I can be as messy as I like so there are some benefits, and plenty of room to spread out the pieces. Next step is to paint them up to a realistic brown dirt track colour, which may take a bit of tinkering to get it to look right.